A beginners guide to Rive and micro-interactions
Discussing the magic of micro-interactions and providing a step-by-step guide to using Rive for your next project.
Have you ever noticed how the small animations on your favourite websites and apps bring them to life? That's the magic of micro-interactions.
They are the secret ingredient that enhances the user experience, making it memorable and engaging. Micro-interactions are not merely delightful snippets within your product; they often offer crucial feedback for user actions, making them essential for creating a seamless and intuitive experience.
Micro interactions have long been integral to the industry, with designers leveraging various tools to craft delightful and engaging animations and micro-interactions. Over the years, these tools have evolved, offering increased flexibility and a more comprehensive set of features, greatly aiding designers in realizing their creative visions. One such tool is Rive, which allows designers to design, add logic, and export clean code for engineers' use. I'll be guiding you through the process of building your own animation in Rive.
The Power of Micro-interactions:
Let's talk about how these tiny animations may seem insignificant, but trust me, they're the secret sauce of a memorable user experience.
Why Micro-interactions Matter:
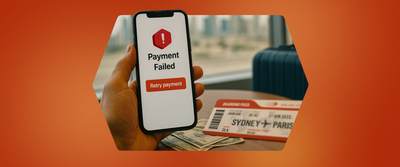
- Feedback and Guidance: Micro-interactions offer instant feedback, guiding users through your interface with subtle cues like changing button colours or animated transitions.
Payment success screen on Headout app
- Enhancing Engagement: To keep users hooked, well-crafted micro-interactions make interactions delightful and engaging, ensuring users stay glued to your creation.
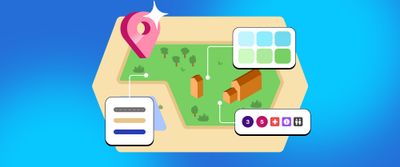
Fluffy: Headout's AI
- Brand Personality: From playful loading animations to quirky sound effects, micro-interactions are your canvas for showcasing brand identity.
Headout app splash screen
- User Delight: Last but not least, micro-interactions are all about spreading joy. Surprise and delight your users with thoughtful animations, and watch as they fall in love with your product or service.
Rive: Where Magic Happens
Picture this: bringing your designs to life with captivating motion is as simple as ABC. Whether you're a seasoned animator or someone just starting to explore the world of motion graphics, Rive has got your back. It's like having a trusted friend by your side on your creative adventures.
Let's Break It Down:
Rive is all about making animation accessible and enjoyable. Here's what sets it apart:
- Vector-based Animations: Say goodbye to pixelation! Rive uses vector graphics, ensuring your animations look crisp and clear on any screen size.
- Timeline Animation: With Rive's timeline interface, you'll feel like a time-bending wizard. Keyframe properties, tweak movements, and voilà – smooth animations at your fingertips.
- Interactive Components: Want to add a dash of interactivity to your designs? Rive's got you covered. Create buttons, sliders, and other interactive components that respond to user input, making your creations truly engaging.
- Code Integration: Developers, rejoice! Rive plays nice with popular frameworks like Flutter. Export your animations seamlessly and integrate them into your projects with minimal fuss.
Rive Tutorial for Beginners:
Now, let's walk through a basic tutorial to get you started with Rive:
Step 1: Getting Started
Fire up Rive and create a new project. Take a moment to acquaint yourself with the interface – the canvas for your creative escapades, the timeline for orchestrating movements, and the properties panel for fine-tuning.
Step 2: Creating Shapes
It's time to bring your vision to life! Use Rive's shape tools to craft the elements of your animation. Whether it's basic shapes or intricate designs, the choice is yours. Arrange and layer them to build your dream scene.
Step 3: Adding Keyframes
Select an object and navigate to the desired point on the timeline. This is where the magic happens. Adjust properties, set keyframes, and watch your creations come alive as you add motion to different elements.
Step 4: Creating Interactions
Why stop at motion when you can add interactivity? Create buttons, switches, and more, and define their states using Rive's state machine. Smooth transitions between states will elevate your design to the next level.
Step 5: Exporting Your Animation
With your masterpiece complete, it's time to share it with the world. Export your animation in the desired format – JSON, GIF, or Flutter widgets – and let your creativity shine bright.
That was just a glimpse of Rive's capabilities and what one can achieve with this tool. I also recommend checking out Rive’s YouTube channel for some interesting tutorials and guides. Do tag @headoutdesign to show your interesting animation with rive.
P.s. Keep an eye on Headout’s products for some engaging animations, and let them inspire you to create your own.
Huge kudos to Roshan Kumar for his exceptional motion design and to Ajith Shaji for his impressive illustrations. Also, a big thank you to Ramakrishna for consistently providing the team with opportunities to enhance their skills with new tools.