Surfing waves: Building the wavy lines figma plugin
We all encounter coding challenges that slow us down, making us wish for a quick fix to streamline the process. Even though learning the logic behind a task can feel daunting, it’s essential to push through.

We all have that one repetitive task that drains our time, and when it comes up, we wish for a magical solution to make it faster and easier. Even though the task might feel tedious and exhausting, its importance forces us to keep going—just like the never-ending chore of laundry.
For designers, one such task is crafting curved and jagged lines for various projects. I found myself doing it repeatedly, and over time, it became so monotonous that I started thinking, "There has to be a simpler way!"
That’s when Ramakrishna had the brilliant idea for the "Wavy Lines" plugin. He saw the challenge and came up with a creative solution that would save time and effort for designers who, like me, need to frequently generate intricate wavy lines. With customisable options, "Wavy Lines" lets you create the perfect pattern without the tedious manual drawing.
Manually creating the wavy lines
Types of wavy lines
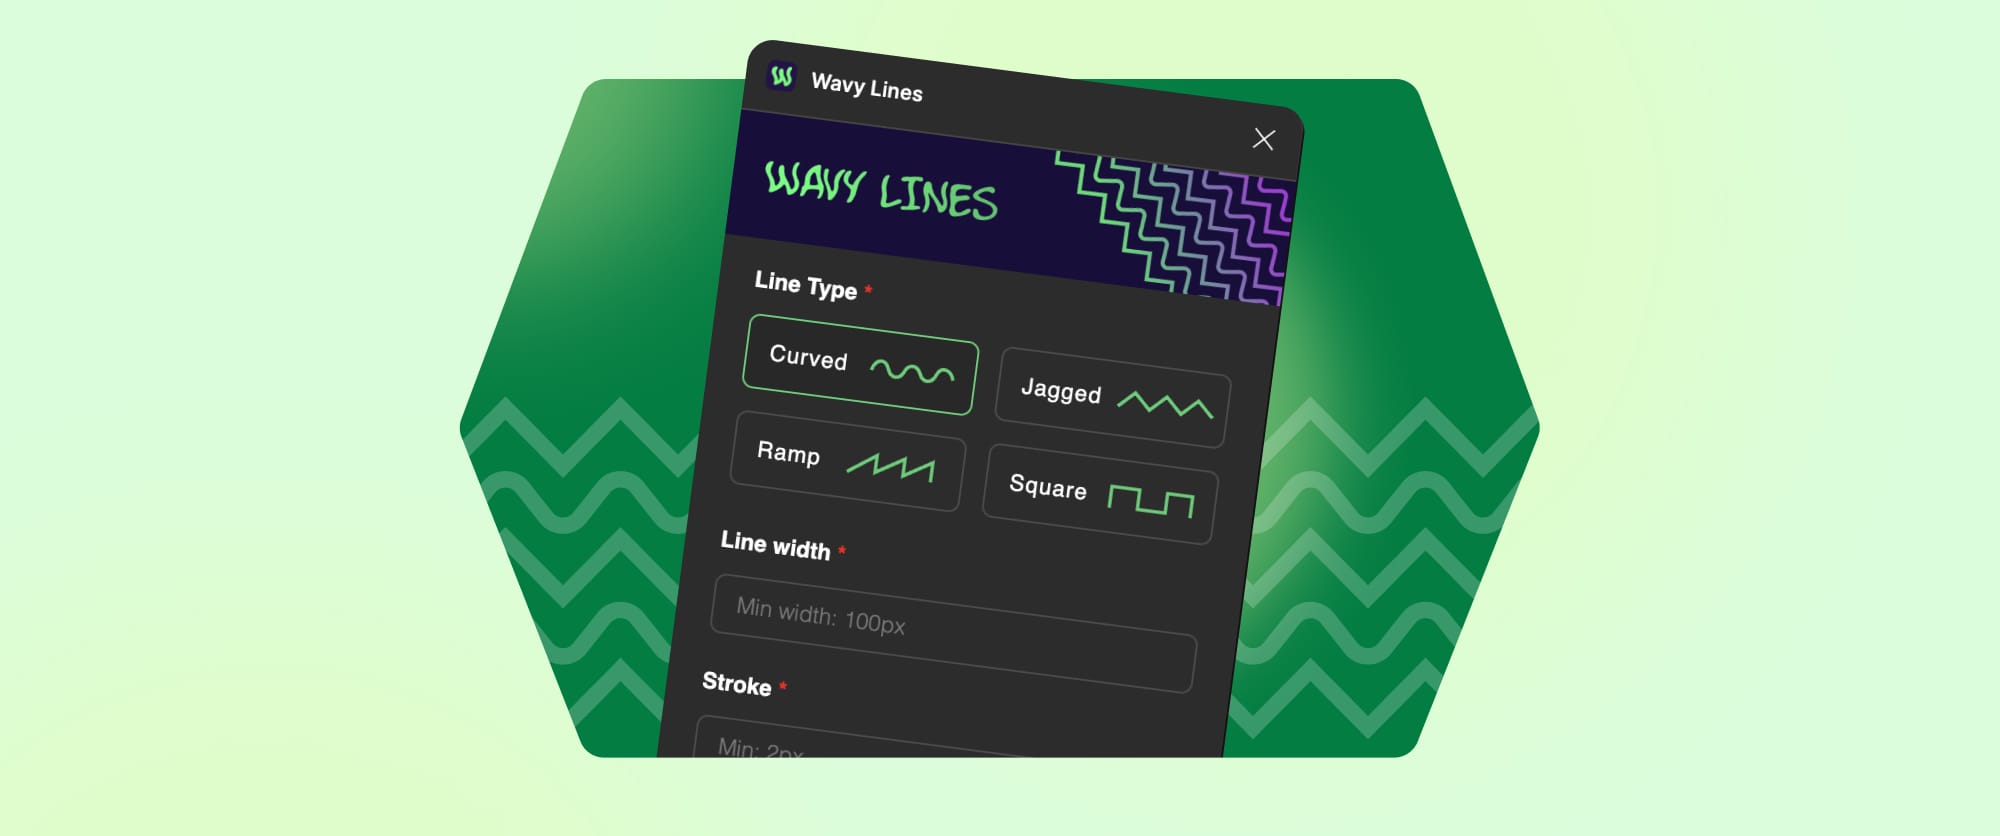
One of the coolest things about the "Wavy Lines" plugin is the variety it offers. Here’s a quick rundown of the different types of wavy lines you can create, along with some ways you can use them:
- Curved Lines: These smooth, flowing lines are ideal for adding a soft, organic touch to your designs. They work great for creating abstract backgrounds, visual separators, or adding a playful vibe to illustrations. Use them in marketing materials, logos, or presentations to bring that fluid feel into your work.
- Jagged Lines: Jagged lines are all about energy and excitement. They’re perfect for bold branding, infographics, or projects where you want to inject some edge. Imagine them on posters, event flyers, or even at the end of tickets or receipts to give your designs a bit of dynamic flair.
- Ramp Lines: Ramp lines are great for showcasing progress or change. Whether it's for visualising data, creating charts, or adding a bit of motion to your designs, these lines can highlight growth or decline in a clean, engaging way. They're perfect for business presentations, dashboards, or posters where you need to show movement or transformation.
- Square Lines: For a more structured, geometric vibe, square lines are the way to go. They’re awesome for web designs, grid-based layouts, and giving your designs a clean, modern look. You can even use them as a stylish divider at the end of tickets or receipts, adding a unique touch to your deliverables.

How do we start?
First and foremost, it was important to identify the features I wanted to integrate into this plugin, so I started creating some lo-fi wires. Once I finalised the feature list and concept, I started to go through a couple of videos to understand how to create Figma plugins and honestly, my coding acumen was subpar at best, so I used the one and only, ChatGPT, all of our best friend nowadays, to guide me through this challenge.
So that makes the list of tools used: Figma (Design), HTML, CSS, JavaScript/TypeScript (Development) and ChatGPT for help with coding.
The basic setup
If you're new to plugin development, there were a few prerequisites to start building one:
Install VSCode: First, we get the VSCode editor up and running.
Install Figma desktop app: Development and testing happen in the desktop app.
Browse Plugins: Navigate to Profile Menu > Plugins > Development to browse the plugins.
Create New Plugin: We can create a new plugin using one of the default templates, choosing With UI & browser APIs for full configuration or load an existing manifest.json file.
Save the Project: For new plugins, a prompt will appear to save the project.
Open the Project Folder: Open the project folder with VSCode or in the terminal, navigate to the project folder and type cd <folder-path> , then code. to open the project.
File Responsibilities:
- ui.html - handles browser APIs. In other words, the user interface
- code.ts - contains plugin logic & communication with Figma APIs
Note:code.jsis the auto transpiled version ofcode.ts. If you're uncomfortable with types and want to use plain javascript, you could go ahead and deletecode.tsfrom the project and make your changes directly in thecode.jsfile. - manifest.json - this primarily handles configurations. You generally wouldn't need to mess with this file except for giving your plugin access to external domains. For instance, allowing google fonts would look like
 "networkAccess": {
    "allowedDomains": [
      "https://fonts.googleapis.com",
      // add other domains here
    ]
  }
The code journey: A collaborative effort
When it came time to build the actual code for the "Wavy Lines" plugin, I initially faced some challenges. My coding experience was fairly basic, so I decided to turn to ChatGPT for guidance. It played a crucial role in helping me understand how to structure the plugin and write functional code. Whenever I encountered complex logic or bugs that seemed tough to solve, I’d ask GPT to break down the issue and suggest fixes.
One of the tricky parts of building the plugin was getting the wavy lines to behave exactly the way I wanted them to. My original logic involved creating multiple individual lines that, when combined, would form a wavy pattern. This approach, however, wasn’t efficient, and it wasn’t quite giving me the effect I needed.
That’s when Debanwita stepped in and provided her expertise. She carefully examined the logic I had written and offered a more streamlined and effective solution. Her adjustments transformed the plugin, making the lines smooth and continuous, just as I envisioned.
While ChatGPT helped me debug several issues, Debanwita's input was invaluable in refining the logic, ensuring that the lines were generated correctly and that the plugin operated smoothly. Together, we combined our skills to create a seamless, functional tool that has since been used by hundreds of designers.
Implementation
We already know that ui.html handles browser APIs, and code.ts handles Figma APIs. The foremost question that one might have is how to make them talk to each other. There are two nifty inbuilt functions for this. parent.postMessage() sends information to the Figma APIs. figma.ui.onmessage() receives this information. For our use case, these are the values that we need to communicate:
parent.postMessage({
  pluginMessage: {
    type: 'createLine',
      lineType,
      strokeWidth,
      cornerRadius,
      edgeFreq, // number of edges
      lineLength,
      rotationAngle
  }
}, '*');
To create a vector that gives me the desired effect, I needed to understand the anatomy of a vector.
As an exercise, let's work out an example of a "curved" wave that has a single crest (i.e. two vector units) of length 200px with an angle of inclination of 30 degrees and a corner radius of 8px. It would look like this:

To ask Figma to draw this using code, the first obvious requirement is the (x, y) coordinates of each vertex. But before that, we need to initialize a vector.
const exampleWave = figma.createVector()Now onto the math part - we need to calculate the height of wave and width of each unit
const horWidth = lineLength / edgeFreq; // 200 / 2 = 100
const verHeight = horWidth * Math.tan(Math.PI / 180 * rotationAngle); // 200 * tan(value of 30 degrees in radians) = 57.7 (approx)
We know that the y coordinate will always be either of the two values - 0 or verHeight. That only leaves us with calculating the x coordinate for each vertex.
For that, we'll take two variables - xOld and xNew, both initialized to 0 and maintain an array called points that will store the coordinates.
Now, for each vertex, we need to do three things:
// store the current value of x i.e. xOld, and
// the value of y depending on whether its an even vertex or an odd one
points.push({ x: xOld, y: isEvenVertex ? 0 : verHeight });

// calculate the next x coordinate
xNew = xOld + horWidth;

// set the value of current x coordinate to the next one
xOld = xNew;
Now that we have our coordinates, Figma expects the vertices in a particular format. It exposes two APIs to define our vector - vectorNetwork and vectorPaths.
So exampleWave.vectorNetwork becomes :
{
    "vertices":
    [
        {
            "x": 0,
            "y": 57.7,
            "cornerRadius": 8,
            "strokeCap": "NONE", "strokeJoin": "MITER", "handleMirroring": "NONE"
        }
            ,
        {
            "x": 100,
            "y": 0,
            "cornerRadius": 8,
            "strokeCap": "NONE", "strokeJoin": "MITER", "handleMirroring": "NONE"
        }
            ,
        {
            "x": 200,
            "y": 57.7,
            "cornerRadius": 8,
            "strokeCap": "NONE", "strokeJoin": "MITER", "handleMirroring": "NONE"
        }
    ],
    "segments":
    [
        {
            "start": 0,
            "end": 1,
            "tangentStart": {"x": 0, "y": 0}, "tangentEnd": {"x": 0, "y": 0}},
        {
            "start": 1,
            "end": 2,
            "tangentStart": {"x": 0, "y": 0},  "tangentEnd": {"x": 0, "y": 0}}
    ],
    "regions": []
}
and exampleWave.vectorPaths:
[
    {
        "windingRule":"NONE","data":"M 0 57.7 L 100 0 L 200 57.7"
    }
]
And that's it! It's that simple.
We understood how a vector is drawn through code. On taking a closer look, you'd see a pattern within the format that can be simulated using the x and y coordinates. For larger waves, we can generate this pattern using the exact same concept and a few for-loops, which is what I eventually ended up doing.
It is objectively a great exercise on breaking down complex looking problems into solvable units. It gave me enough grasp on the working of vectors to extend the plugin to have four different line types, all of which share the same underlying principle.
Using the plugin
Open the Plugin: Search for Wavy Lines on the Figma community and open it on your art board.
Select Line Type: Choose the type of line you need: Curvy, Jagged, Ramp or Square.
Enter Specifications: Input all necessary specifications for the line.
Create Line: Click "Create Line."
Impact and user feedback
Within the first week of release, the plugin attracted more than 1,000+ users. The positive responses confirmed that the effort and time put into the project were worthwhile and inspired me to continue enhancing the plugin based on user feedback.

Conclusion
Working on the "Wavy Lines" plugin was incredibly fulfilling and a learning experience for me. It underscored the significance of problem-solving and the advantages of utilising resources like ChatGPT. This shows how effortlessly people can automate manual tasks by creating powerful plugins and also make meaningful contributions to the design community.
Thanks and kudos to Debanwita Mahato for helping me out with the plugin. Also, a big thank you to Ramakrishna for consistently providing the team with opportunities to enhance their skills with new tools.
Check out the plugin here: Wavy Lines Plugin ✨


